How to connect an S3 bucket
In your project’s dashboard:
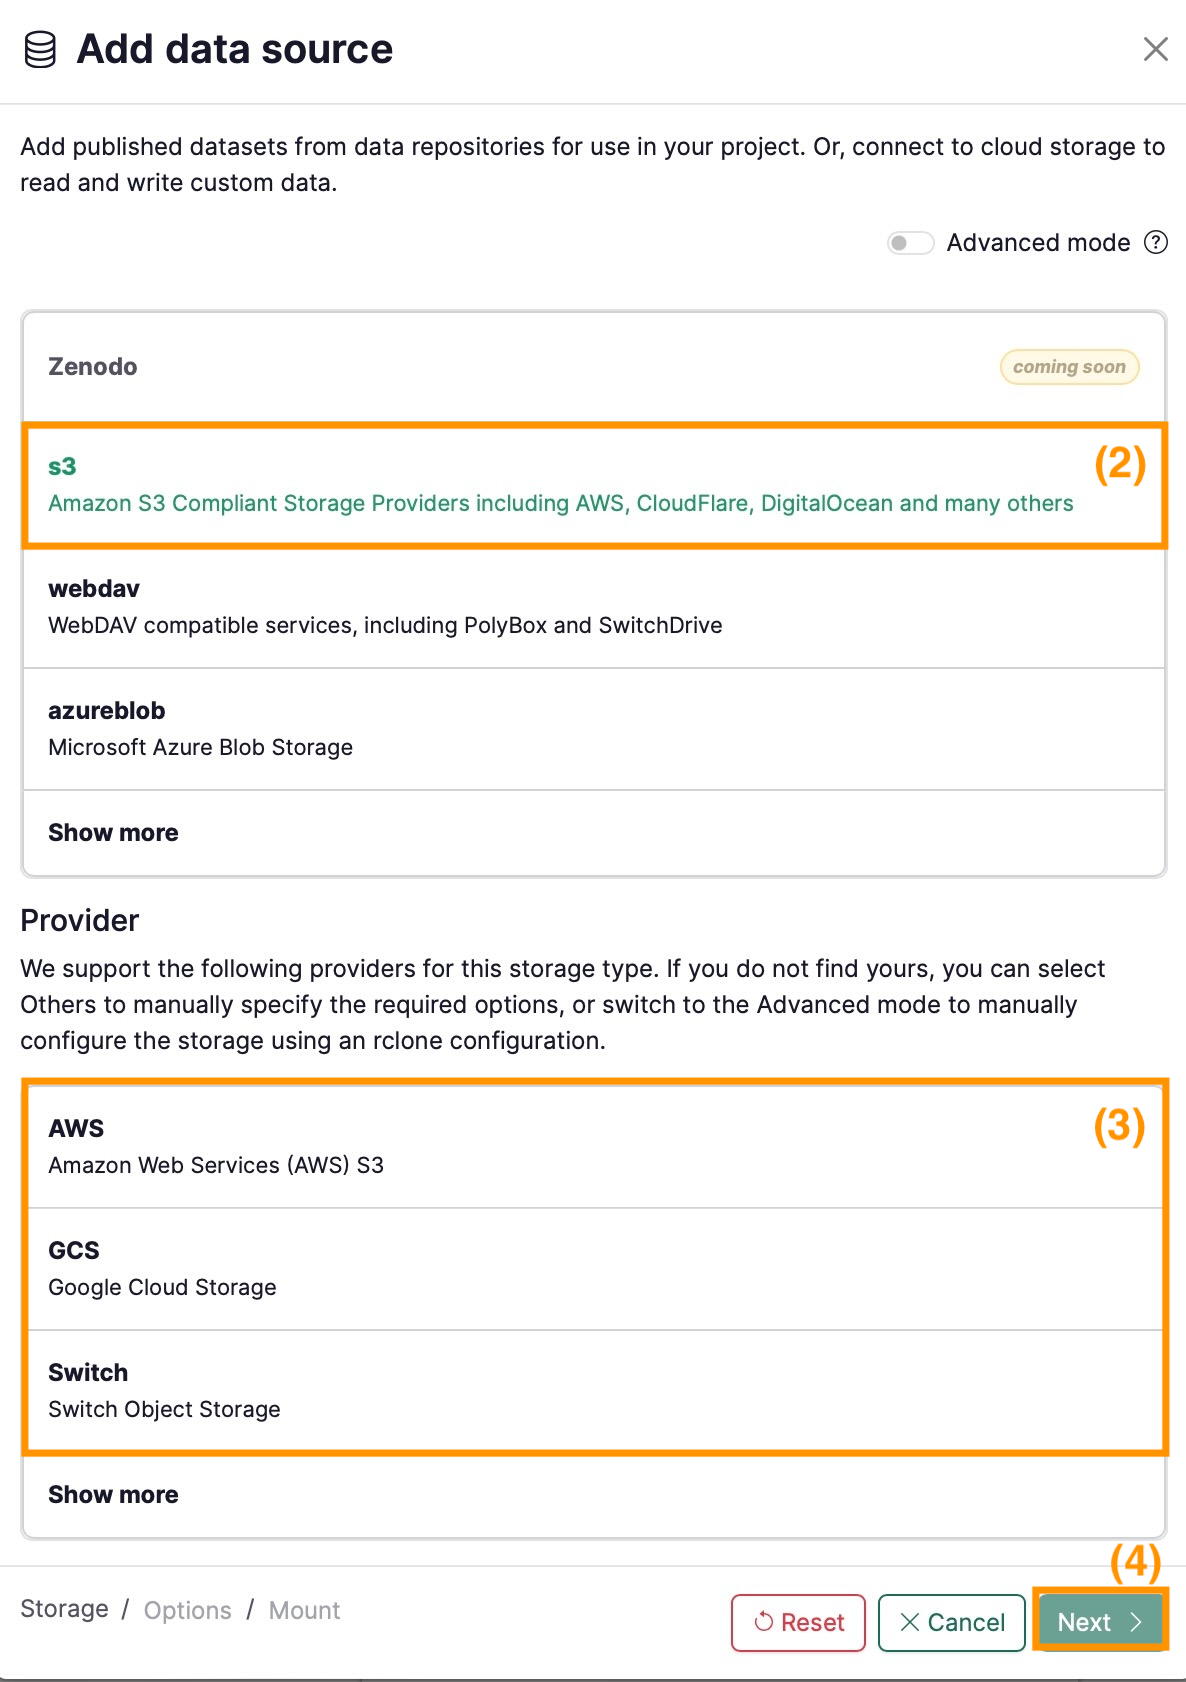
- Under Data section click on + button
- Select s3 under Storage type
- Select the provider of the cloud storage (e.g. AWS)
- Click on Next
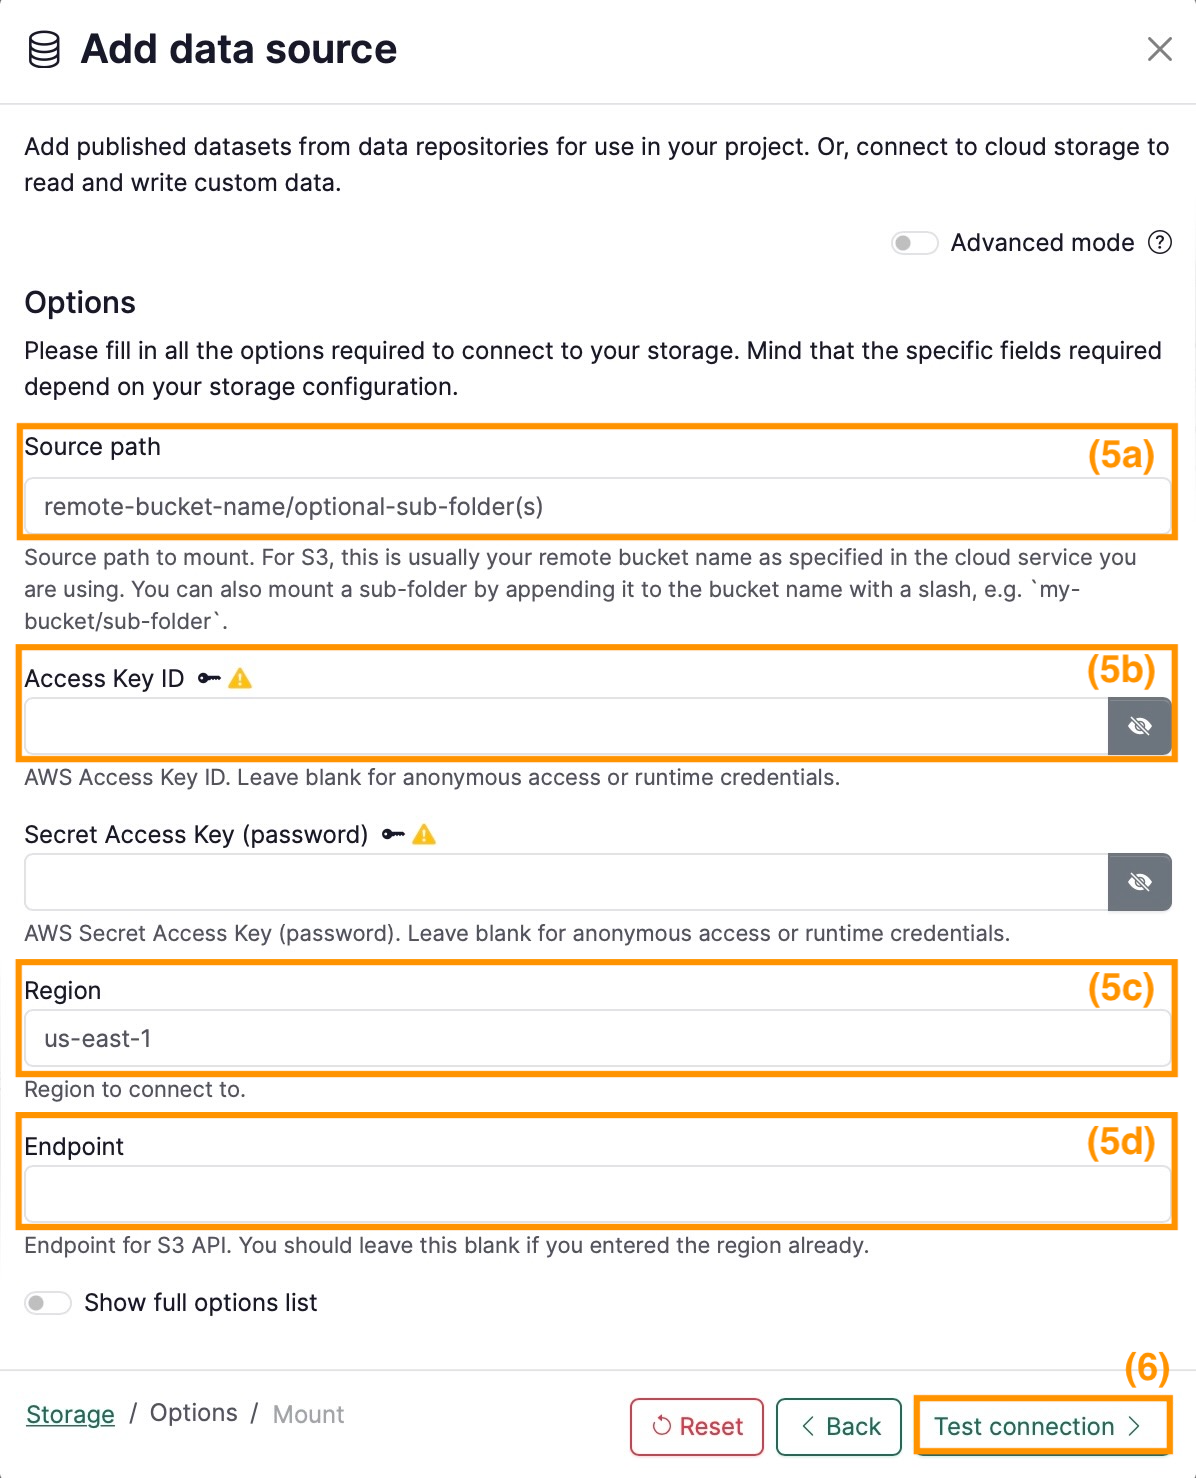
- Set the properties in the form:
- Source path (5a): Source path to mount. For S3, this is usually your remote bucket name as specified in the cloud service you are using. You can also mount a sub-folder by appending it to the bucket name with a slash, e.g.
my-bucket/sub-folder. (e.g. giab) - Access Key ID and Secret Access Key (5b): If the bucket requires credentials, enter them here
- Region (5c): (e.g. us-east-1) This field is not required for all buckets. For some cases AWS provides the Region/Endpoint to your s3 bucket as explained here. Switchengines provides further information about Region and Endpoints here.
- Endpoint (5d): (e.g. http://s3.amazonaws.com) This field is not required for all buckets. If the Region is already provided, Endpoint should be left empty.
- Source path (5a): Source path to mount. For S3, this is usually your remote bucket name as specified in the cloud service you are using. You can also mount a sub-folder by appending it to the bucket name with a slash, e.g.
- Click on Test connection and if succeeds, click Next
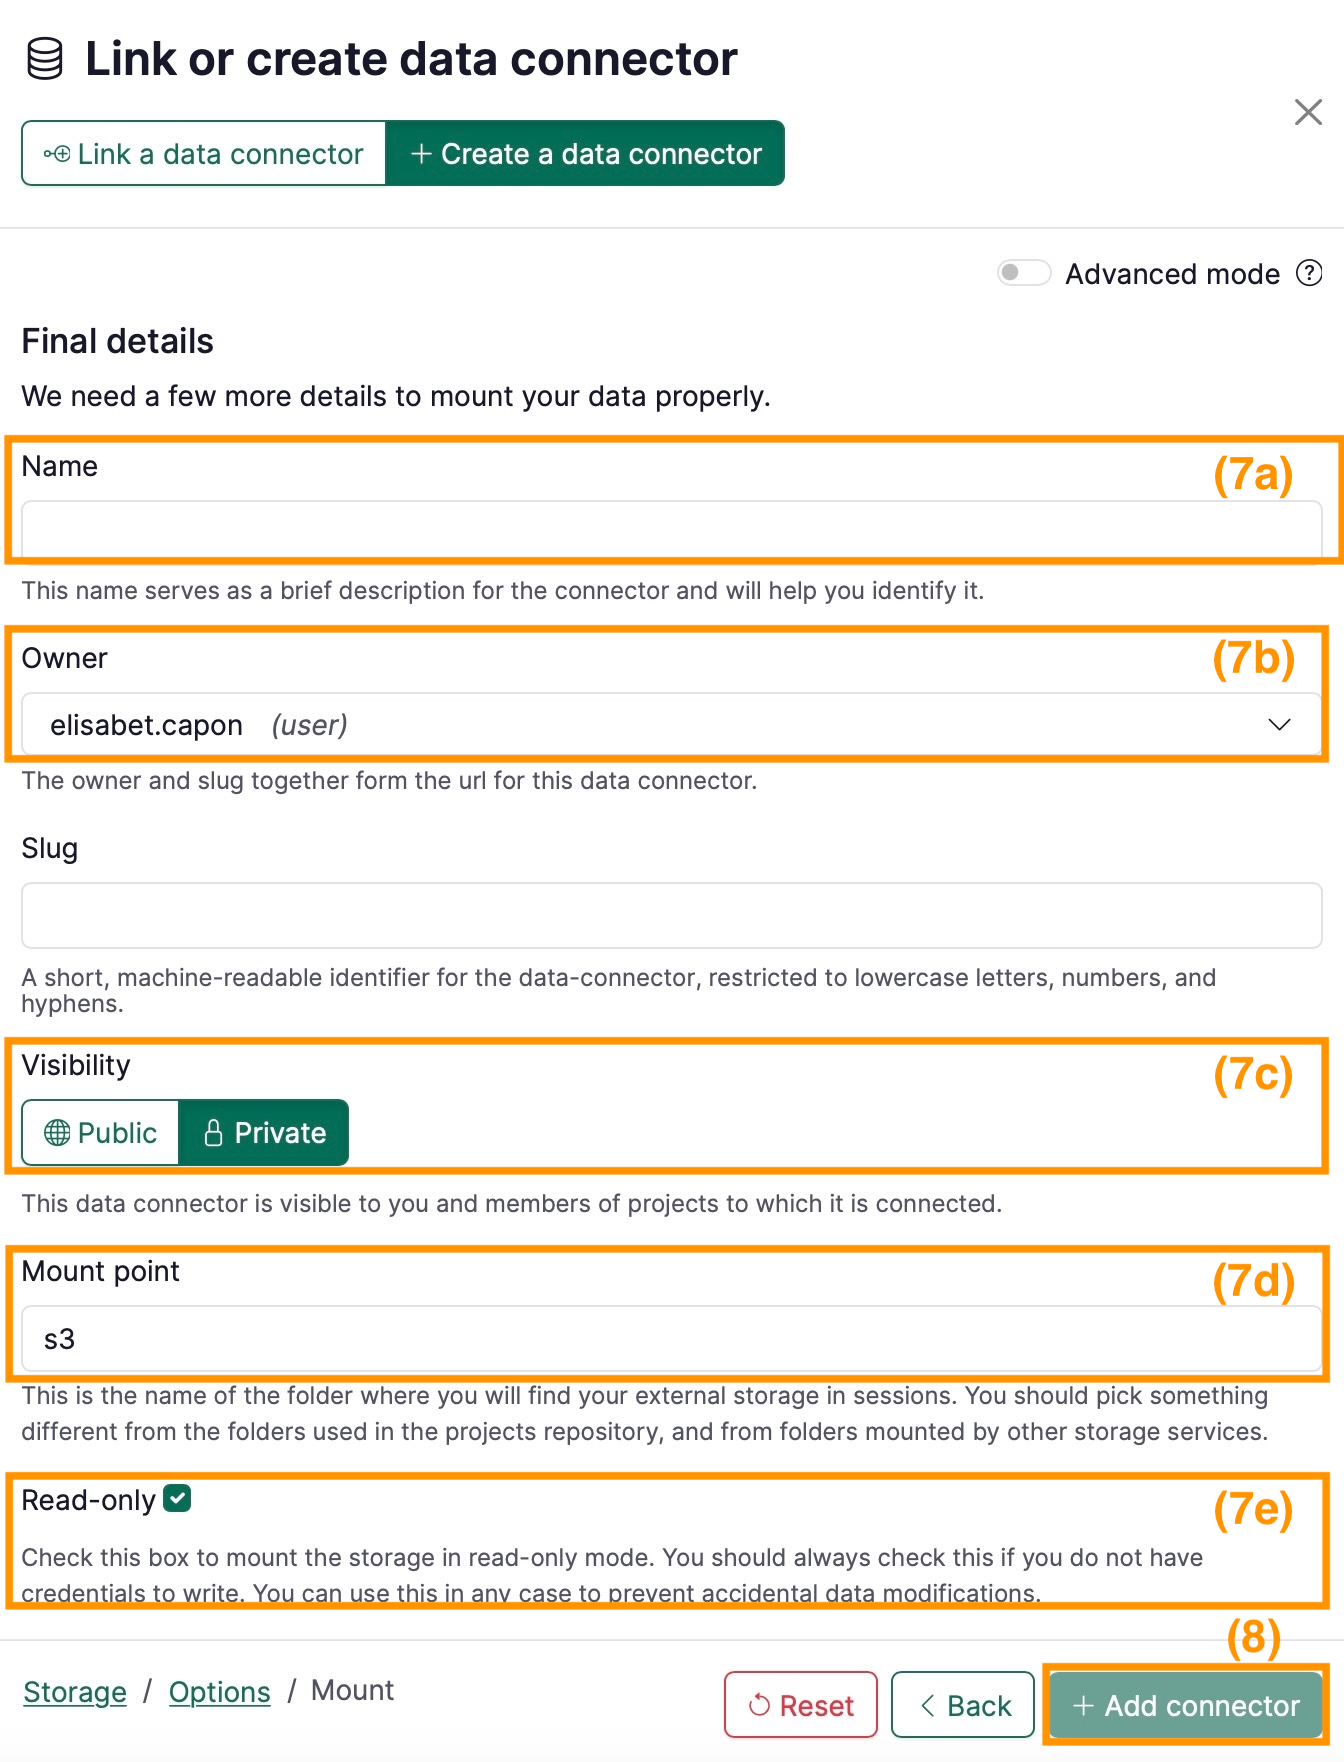
- On the last page, fill in the final details for your data connector, namely:
- Name: pick any name for the data connector (e.g.
Giab) - Owner: select the namespace of the data connector (e.g. the user’s or a group).
- Visibility: decide whether the data connector should be Public or Private.
- Mount point: write the folder in your session where the s3 will be mounted.
- Read-only: uncheck this box if your s3 is write and read.
- Name: pick any name for the data connector (e.g.
- Add the connector.