How to connect a personal Switchdrive or Polybox folder to your project
Only use this How-To guide to connect a folder that only you use. To connect a folder that you share with others, see How to connect a shared Switchdrive or PolyBox folder to your project .
-
Add a new data connector by clicking the ➕ in the Data section of your project.
-
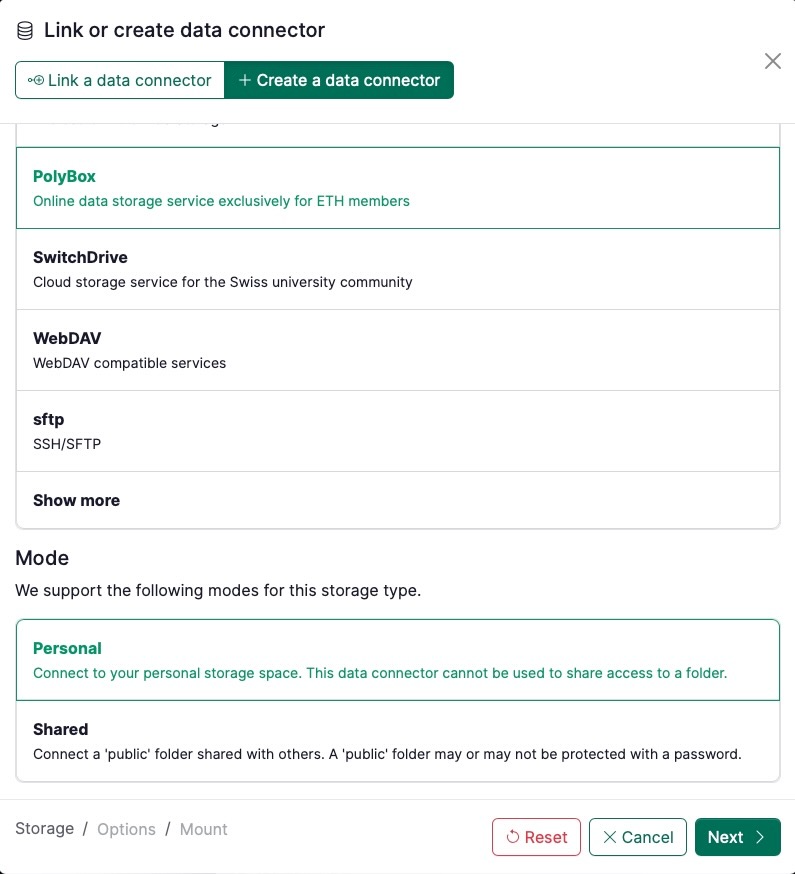
Click on Create a data connector and choose Polybox (or SwitchDrive) and at the bottom select Mode > Personal.
-
Click on Next
-
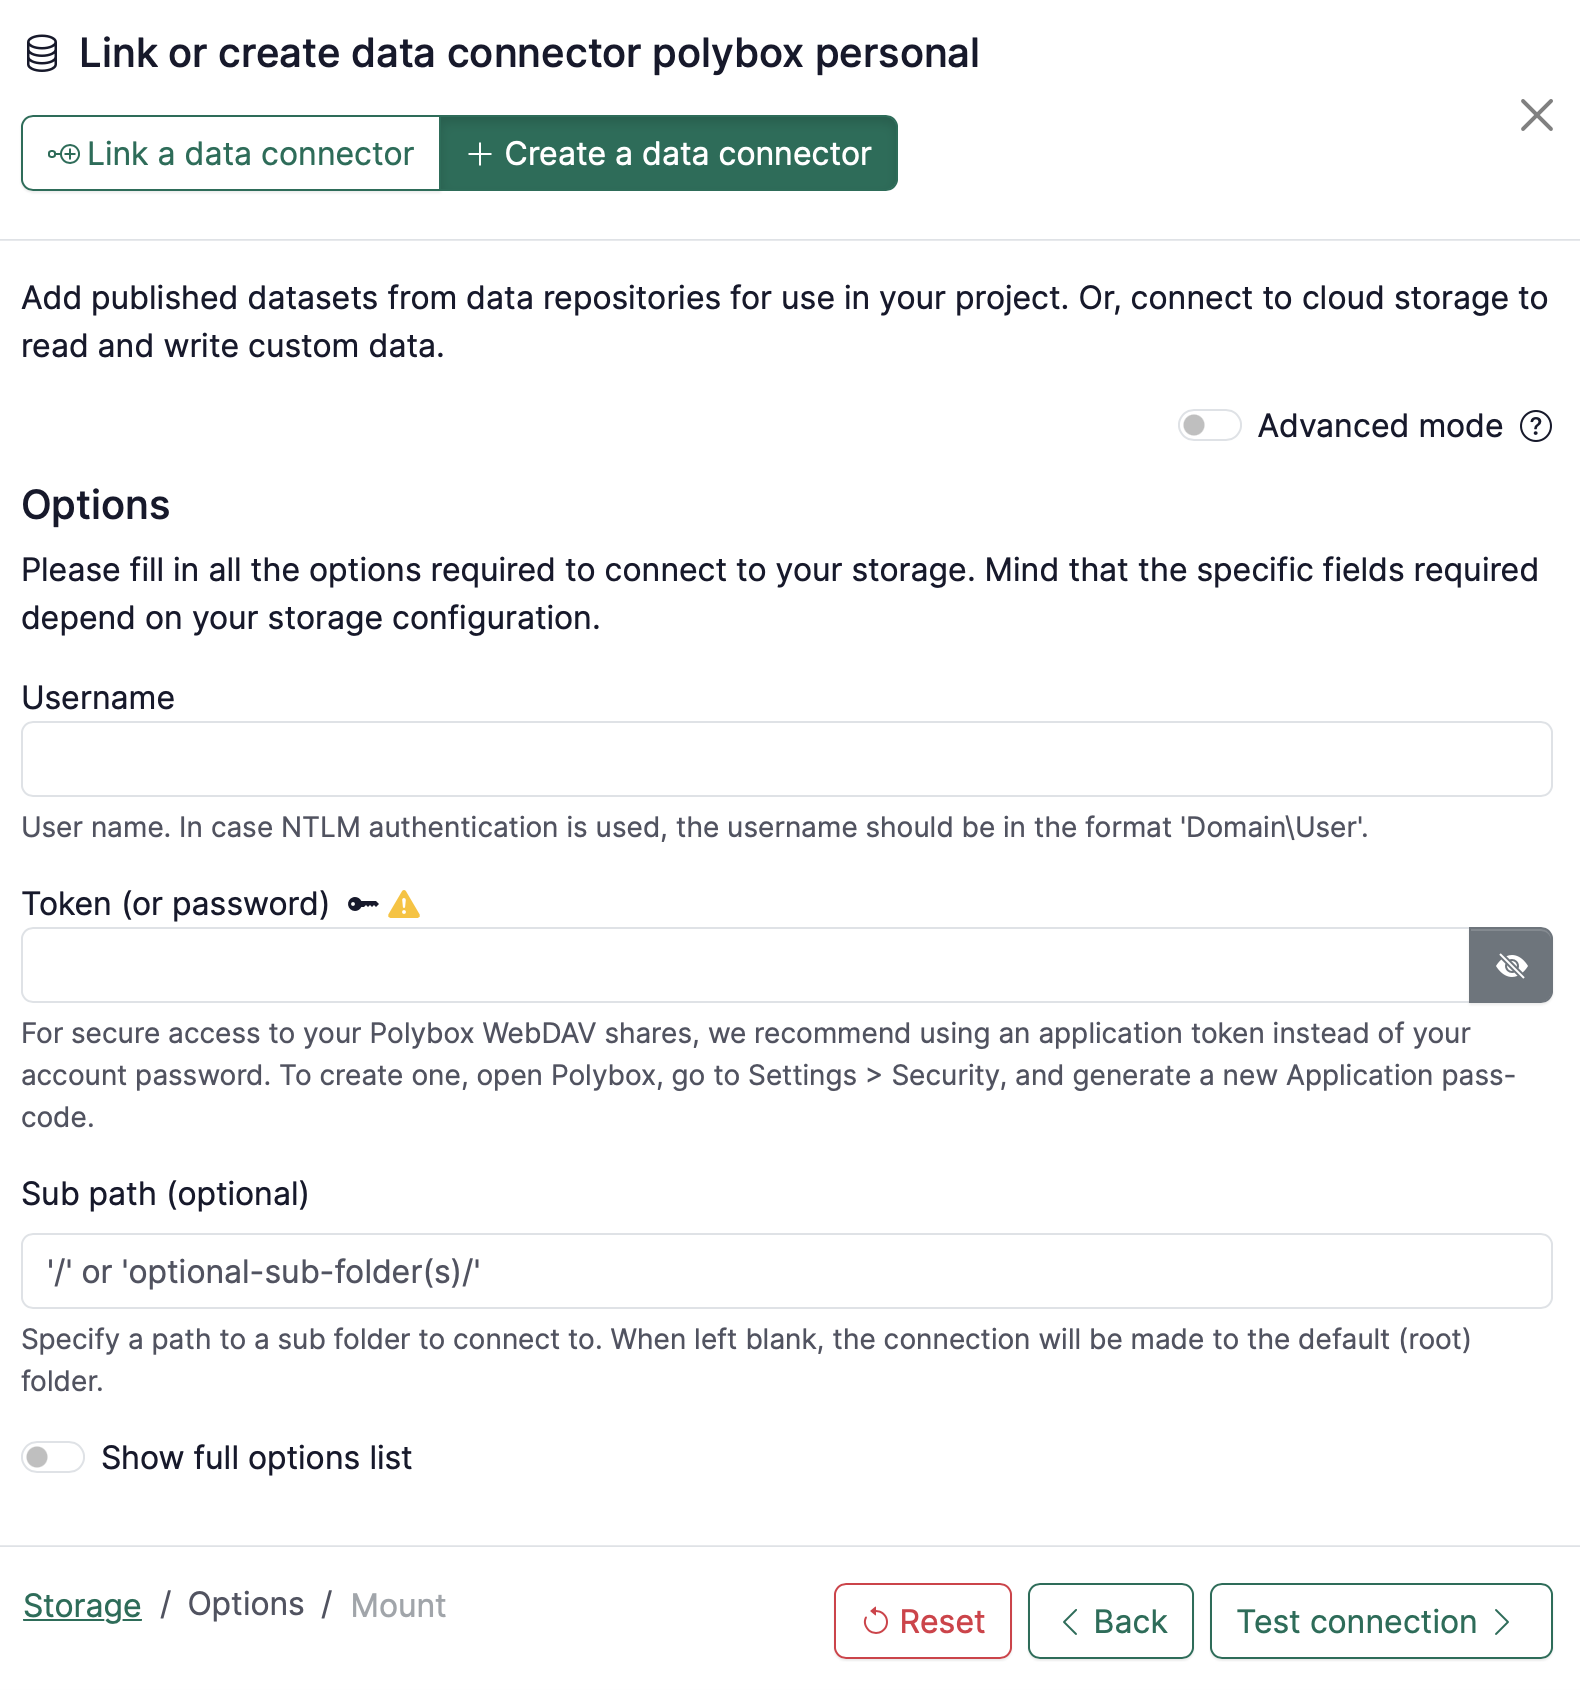
Fill in the options for your data connector, namely:
-
Username: fill in your username
-
Token (or password): We strongly encourage you to create a
tokenfor accessing your private OwnCloud/Nextcloud WebDAV shares to avoid sharing your account password.To create the token, in your cloud storage application (Switchdrive/PolyBox):
- In your account, go to Settings > Security
- Scroll down to Devices & Sessions
- Generate a token with App name and click on Create new app passcode.
-
Sub path (optional): If you want to mount your entire Polybox/Switchdrive folder, leave this blank. If you want to mount a specific folder, write out the path to that folder.
-
Click on Test connection.
-
A message in green “The connection to the storage works correctly.” should appear. Click on Continue.
-
-
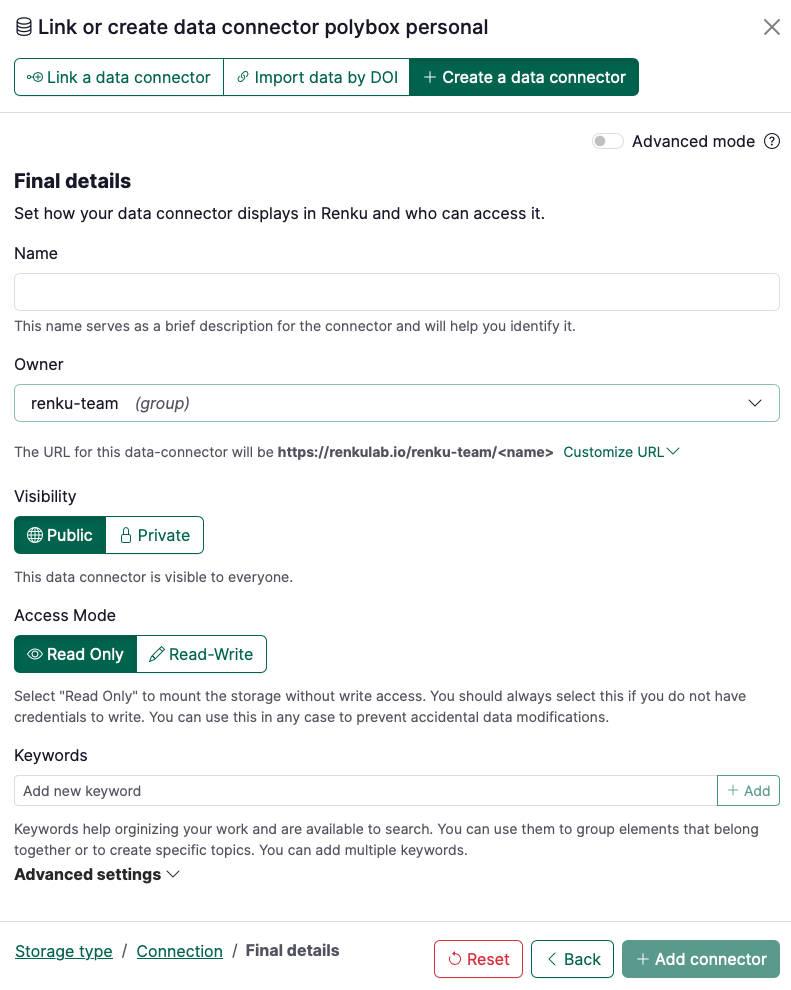
Specify the final details of the data connector, namely:
- Name: term to refer to your data connector
- Owner: select where it belongs (either to the project itself, to you as a user or to a group you are part of)
- Visibility: decide whether it should be public or private
- Read-only: by default is active. Deactivate if you want to have read/write access.
- Keywords: add keywords that may help you organizing your work.
- Advanced settings
- Mount point: name of the directory in your session workspace where the folder will be mounted.
- Save credentials: click this box if you want your token to be saved in your user secrets (only you will have access to those credentials)
-
Click on + Add connector