How to connect to Azure Blob Storage
This guide assumes Storage Account-level permissions. If you had Azure IAM (Identity) rights, you could use "Service Principals" or "Entra ID" logins, which remains outside the scope of this documentation.
Public access
This set-up allows you to provide access to data publicly without requiring authentication with read-only access. For setting this up, you just need your Azure storage account name and the container name. Bear in mind that access is controlled entirely at container level.
Azure portal configuration
-
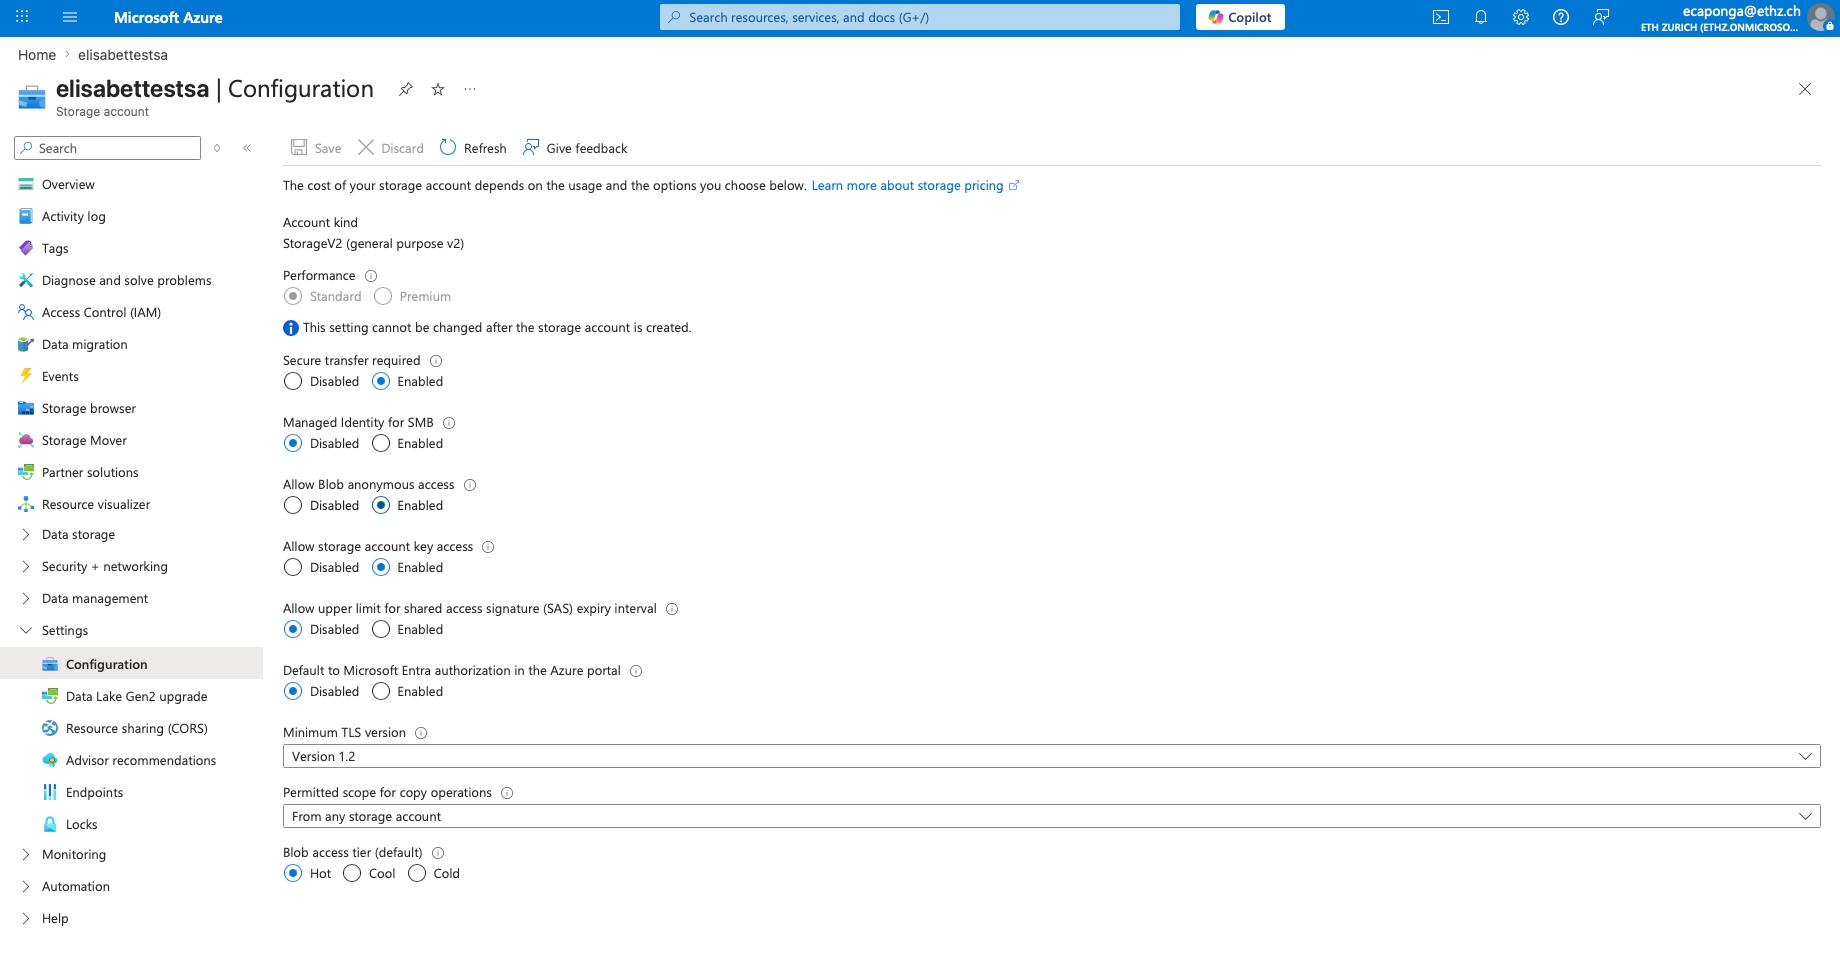
Account level: Go to Settings > Configuration and set Allow Blob anonymous access to Enabled.
-
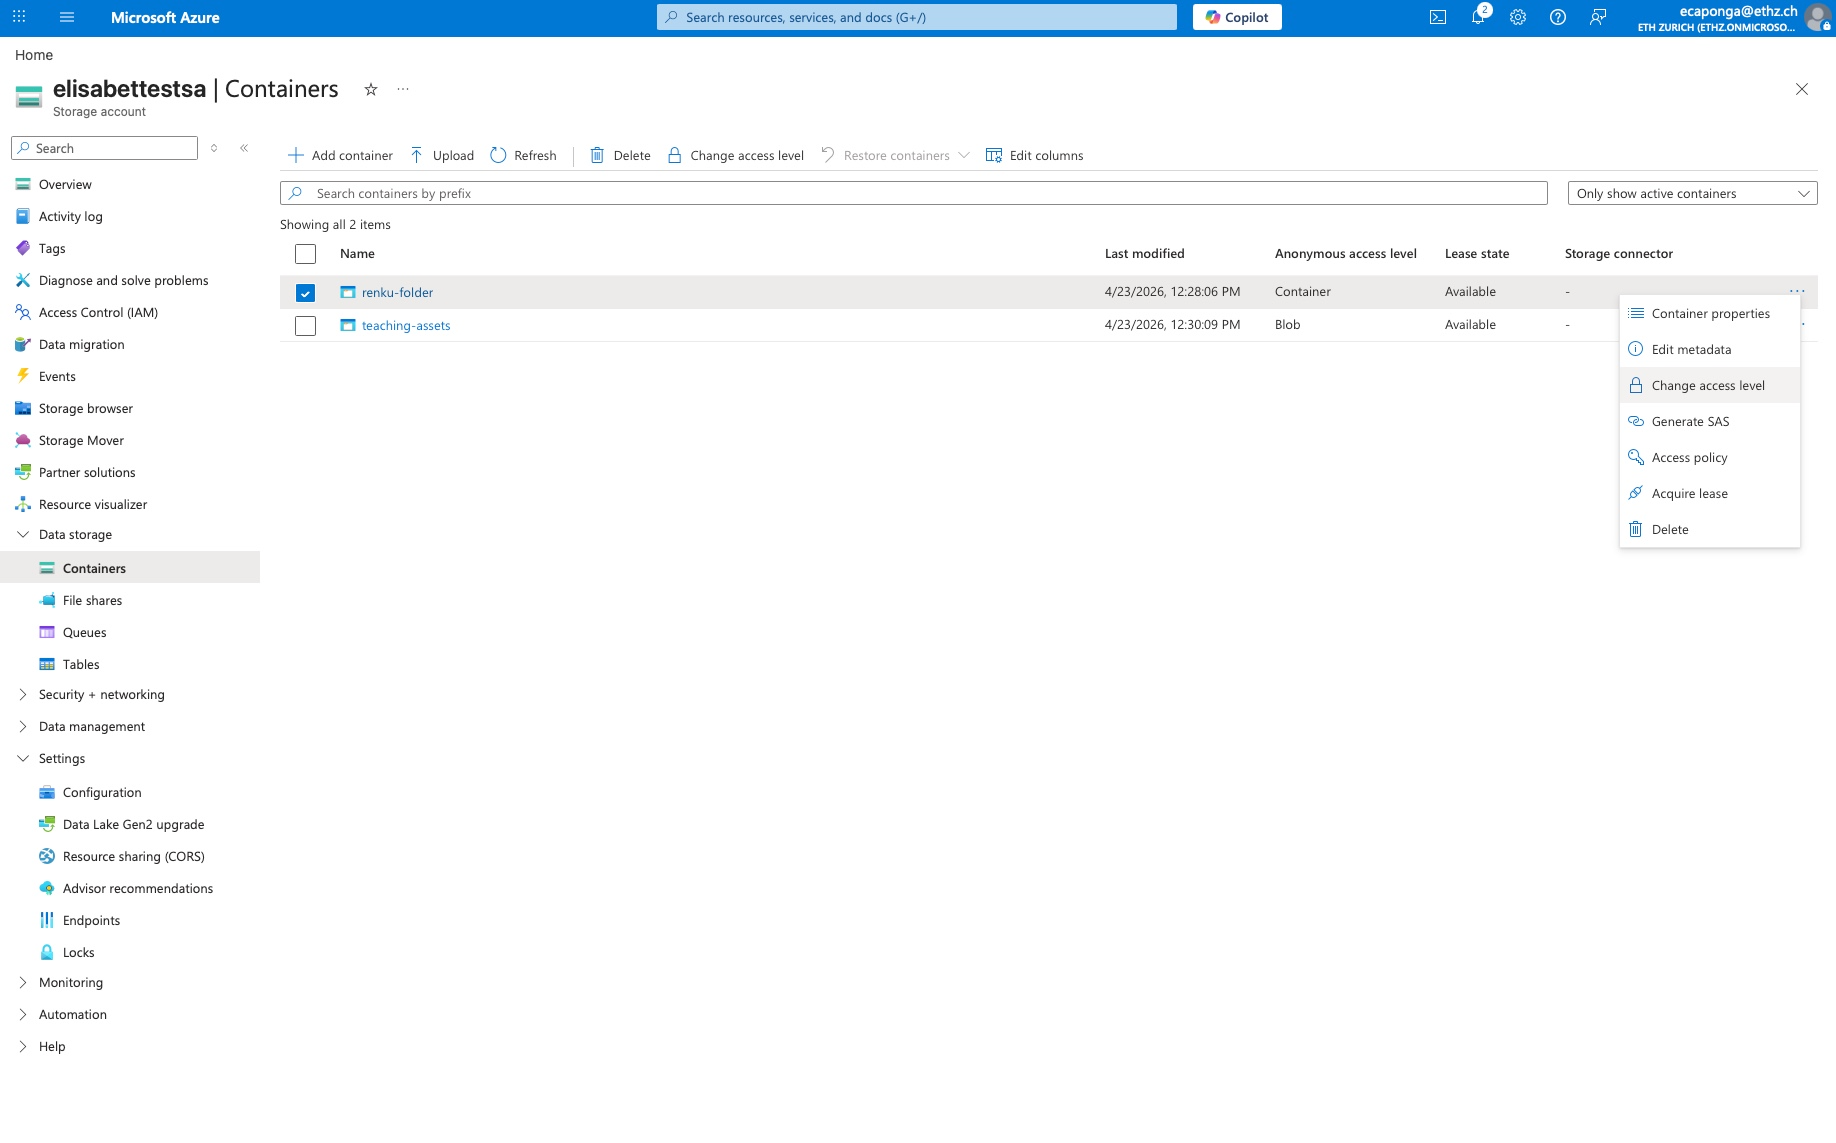
Container level: Go to Data storage > Containers, select your container, and click Change access level.
- Select Container, which allows anonymously listing files and downloading.
Set up in Renku
- Under Data section click on + button
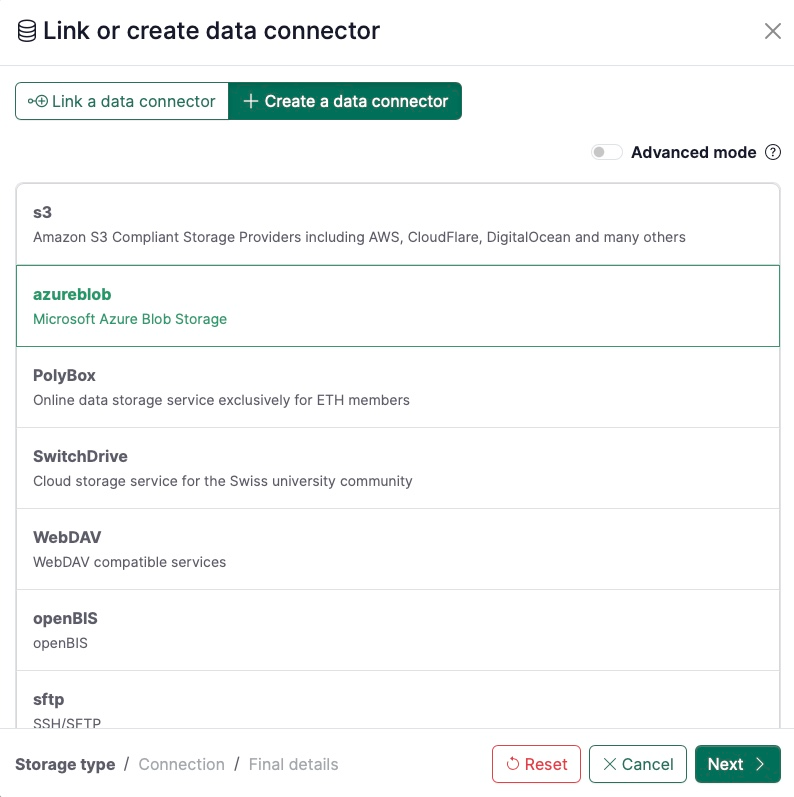
- Go to the tab + Create a data connector and select azureblob.
- Click on Next
-
Set the following parameters in Connection information:
- Source path: the
container_nameas specified in the storage account you are using (e.g.my-container). You can also mount a sub-folder by appending it to the bucket name with a slash, e.g.my-container/sub-folder. - Account Name: the storage account name, e.g.
elisabettestsa
- Source path: the
-
Click on Test connection and if succeeds, click Next

-
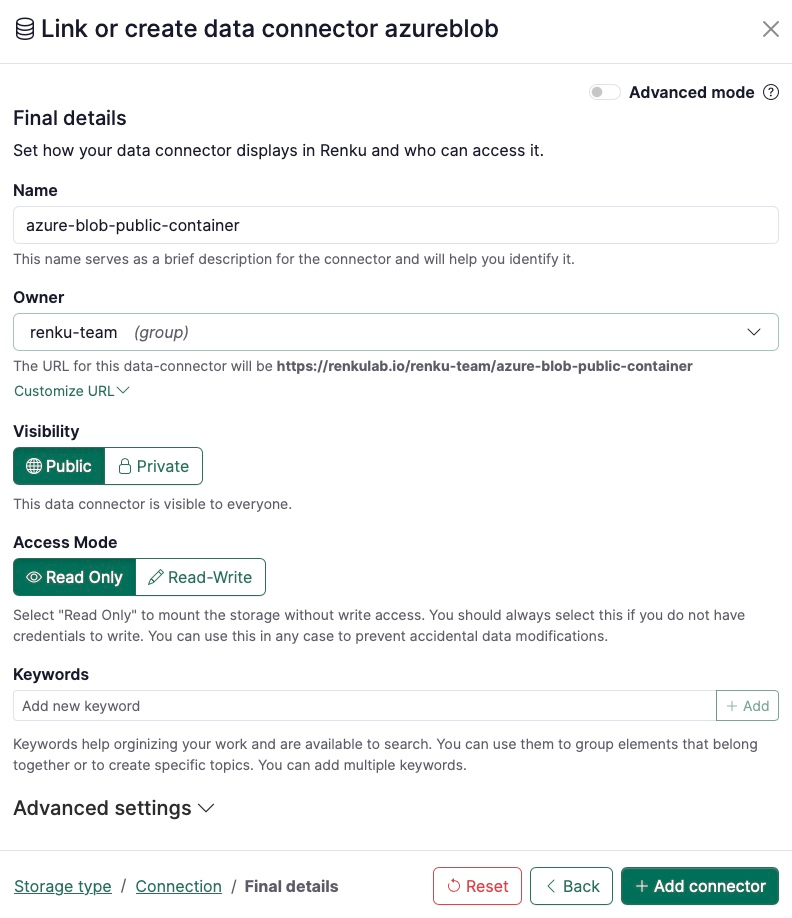
On the last page, fill in the final details for your data connector, namely:
- Name: pick any name for the data connector (e.g.
data) - Owner: select the namespace of the data connector (e.g. the user's, project's or a group's).
- Visibility: decide whether the data connector should be Public or Private.
- Read-only: keep it as read-only access.
- Name: pick any name for the data connector (e.g.
-
Click on + Add connector.
If you set up an Azure blob for public access from a public project, anyone who can see your project may be able to pull data from the storage account. This could incurr egress costs on your Azure subsciption.
Restricted access
Use this option to share data securely with your collaborators and stakeholders, controlling their access rights (e.g. read-only, write and delete files).
Azure portal configuration
-
Go to Data storage > Containers > [Your container] > Settings > Shared access tokens. Select the desired permissions (e.g. Read and List for read-only access, select on top Add, Create and Write for read and write access, avoid Delete if you want an append/upload-only environment).
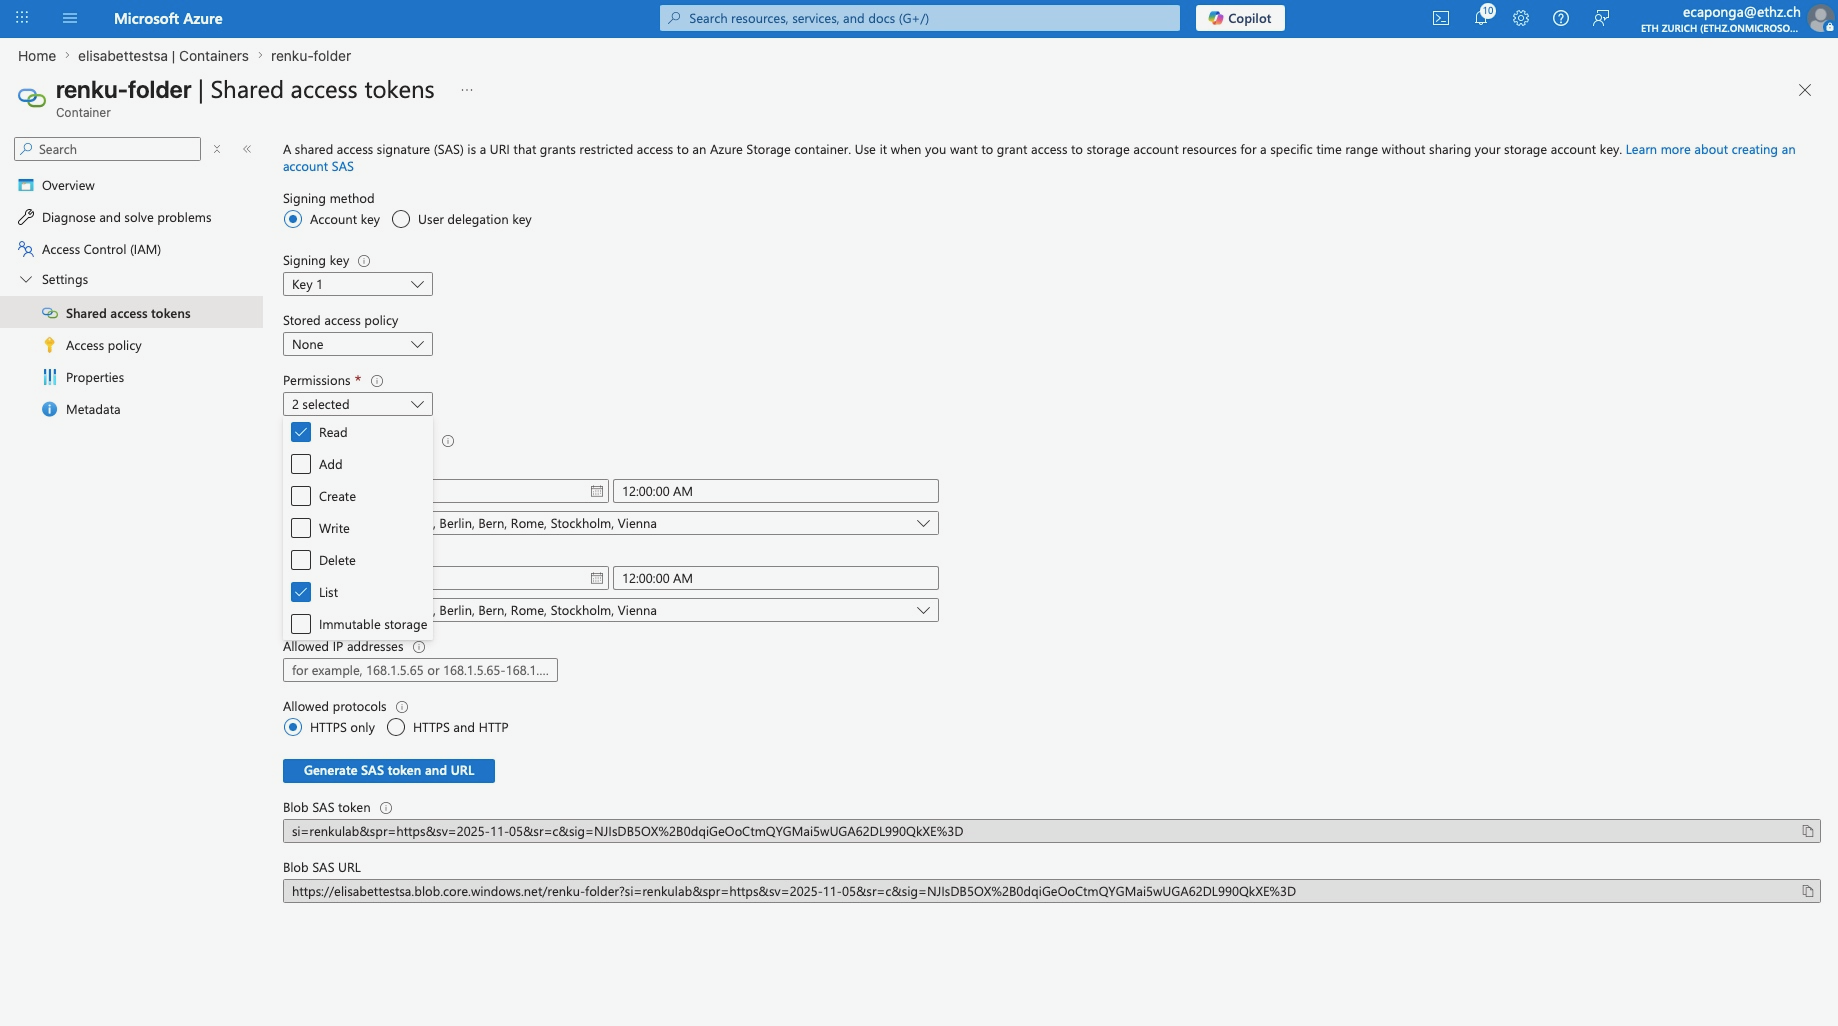
-
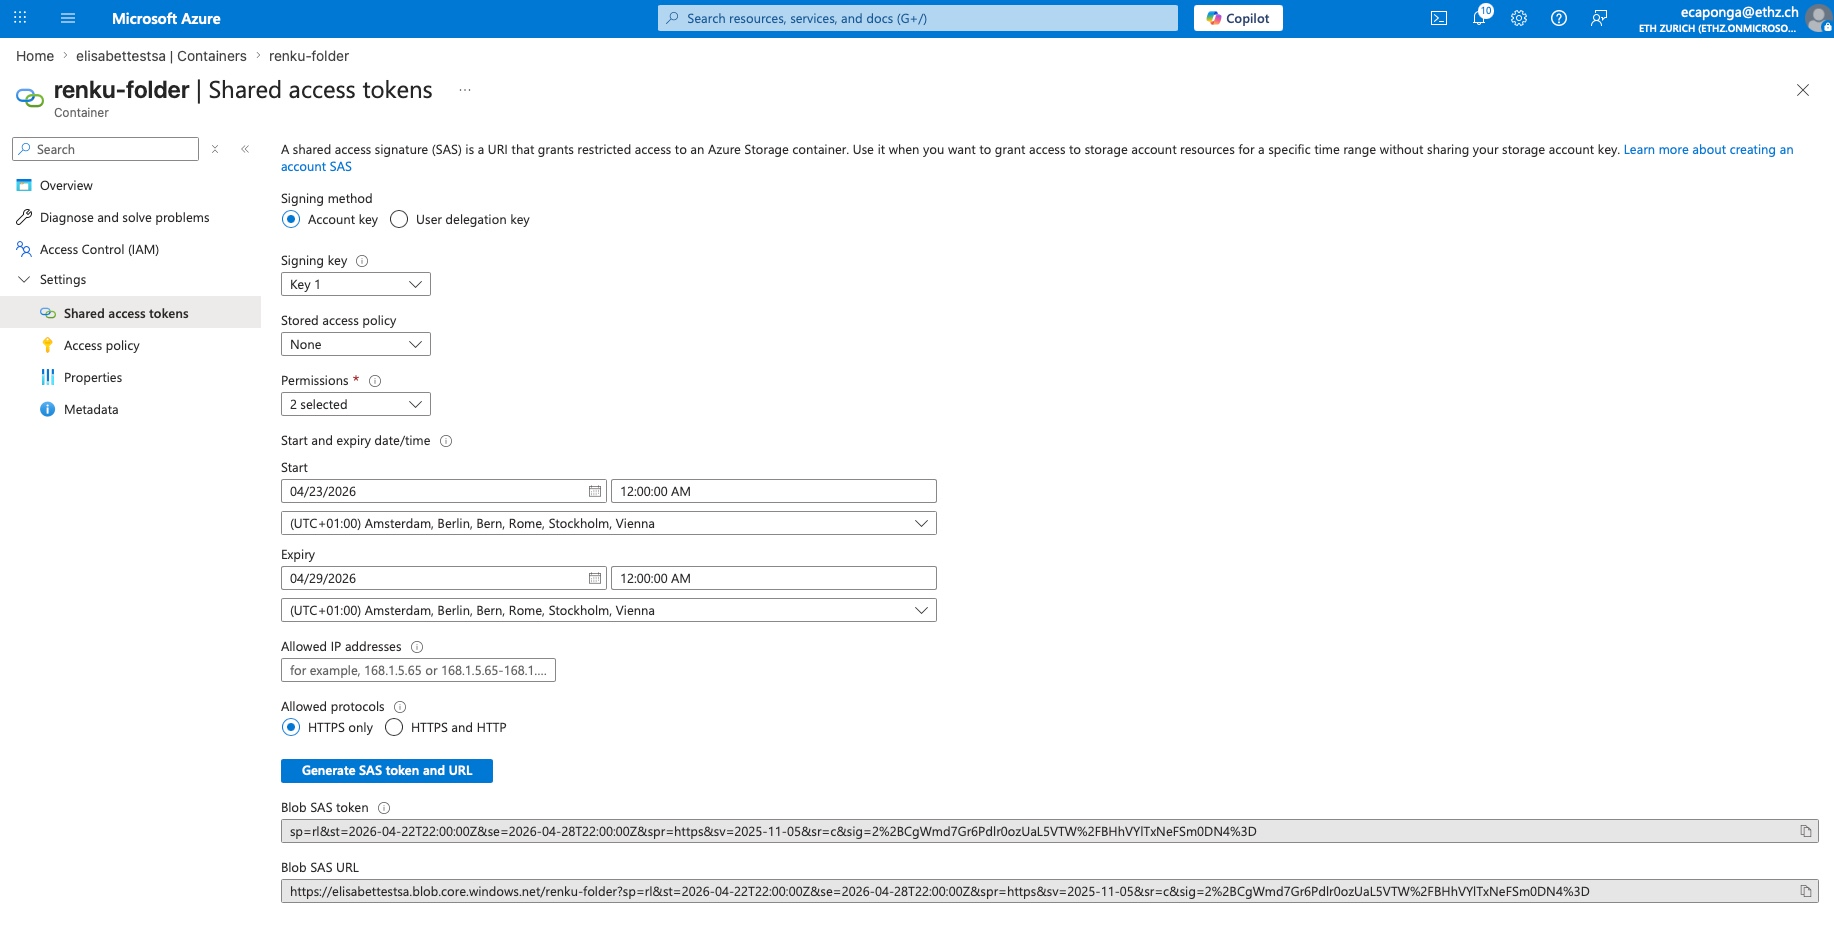
Click on the button Generate SAS token and URL.
-
Copy the generated SAS URL field.
Set up in Renku
Proceed to steps 1 to 3 from the Public access set-up.
- In Connection information, click on Show full options list and set the following parameters:
- Source path: the storage account name, e.g.
elisabettestsa. You can also mount a sub-folder by appending it to the bucket name with a slash, e.g.my-container/sub-folder. - sas_url: the
blob_sas_urlas generated in your storage account.
- Source path: the storage account name, e.g.
Continue with steps 5 to 7 as presented in the public access set-up.
You will need to share the sas_url value with your collaborators since they will be requested to enter the credentials. This will be stored as a user secret. Note also that SAS links expire and there is no automated process for renewing them, so you will need to generate a new one manually.
The most advanced way to manage external access in Azure is through controlled access with revocation, which allows you to revoke access immediately without changing account keys. You need to create the policy under Containers > [Your Container] > Settings > Access policy and click + Add policy. Define a name and the permissions. When you are creating the shared access token, select the policy you just created under Stored access policy. If you delete the policy in Azure, access to the container will be instantly revoked.
Full access to your storage account
This set-up allows you to have access to your full Azure storage account, with the access rights that you decide to set-up.
Azure portal configuration
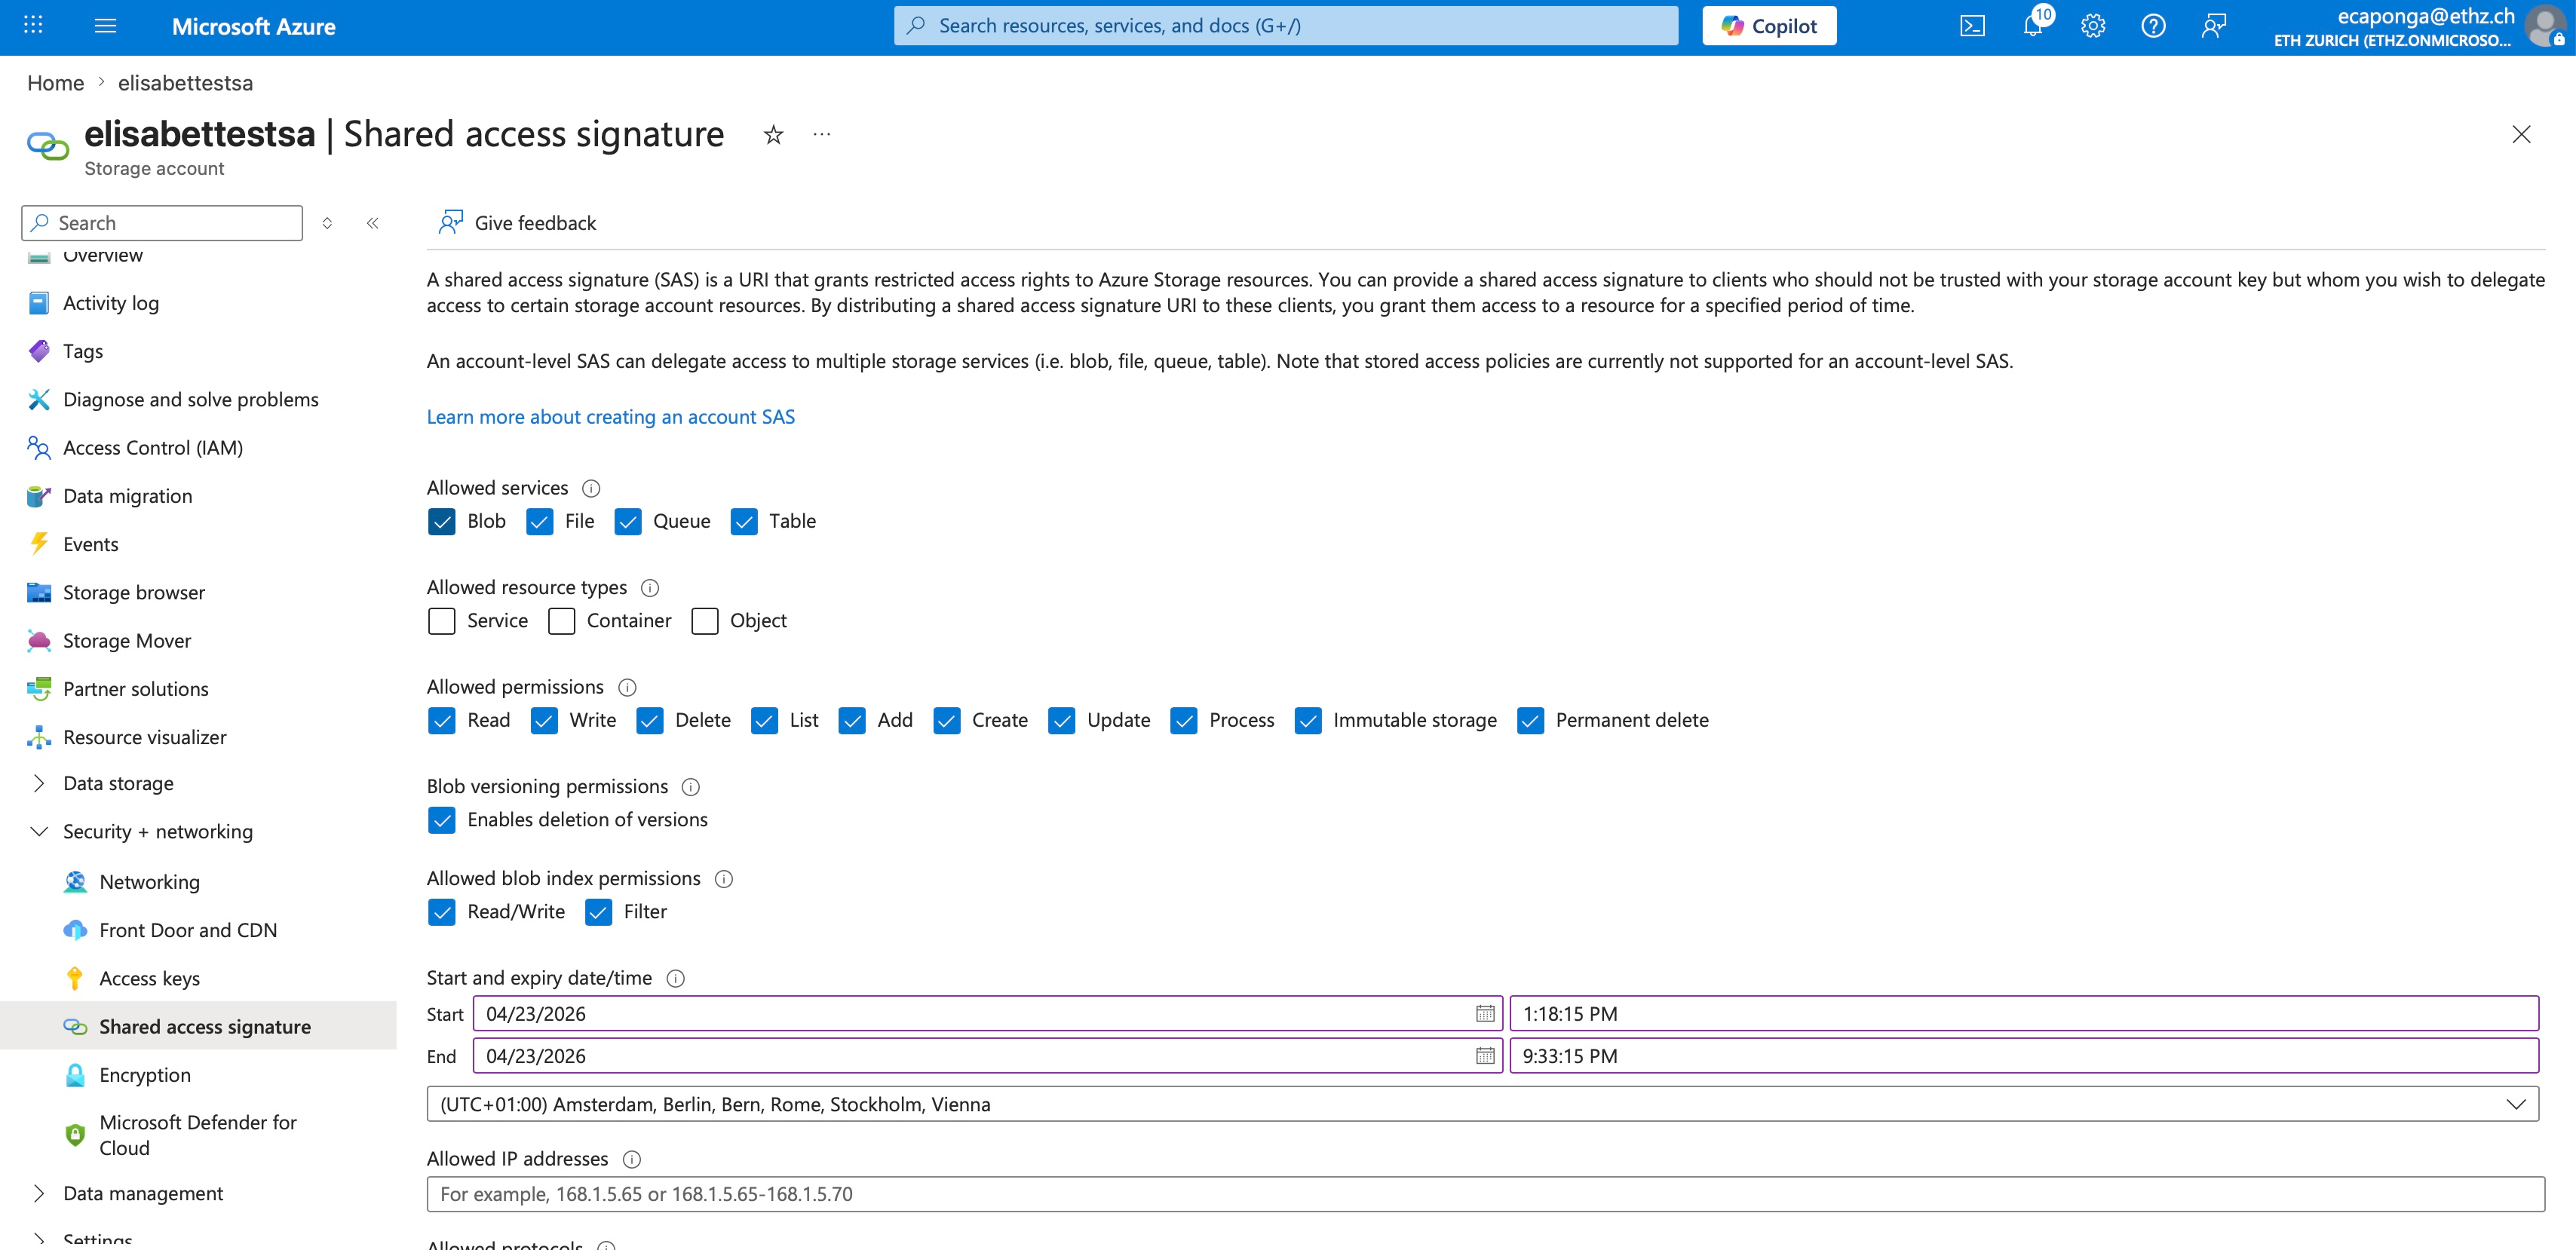
-
Go to Security + networking > Shared access signature. Select Blob service, Service/Container/Object types, and check ONLY Read and List.
Set up in Renku
Proceed to steps 1 to 3 from the Public access set-up.
-
Set the following parameters in Connection information:
- Source path: the
container_nameas specified in the storage account you are using (e.g.my-container). You can also mount a sub-folder by appending it to the bucket name with a slash, e.g.my-container/sub-folder. - Account Name: the storage account name, e.g.
elisabettestsa
- Source path: the
-
Click on Test connection and if succeeds, click Next
-
On the last page, fill in the final details for your data connector, namely:
- Name: pick any name for the data connector (e.g.
data) - Owner: select the namespace of the data connector (e.g. the user's, project's or a group's).
- Visibility: decide whether the data connector should be Public or Private.
- Read-only: do not uncheck this box, or the data connector will not work properly.
- Name: pick any name for the data connector (e.g.
-
Click on + Add connector.